The worst part about colored pencil is that it’s almost impossible to erase, which can be frustrating if you’re trying to get rid of a mistake. The good news is that removing colored pencils doesn’t have to be difficult!

In this article, we’ll discuss the best ways to remove your mistakes and get back on track with your project, so read on to learn how to erase colored pencil with ease!
Why Can’t I Erase Colored Pencils?
The reason it’s so difficult to erase colored pencil is because of the wax in its core.
The key thing that most people miss when trying to remove colored pencils is using a quality eraser, particularly one made for removing this kind of medium.
If you use an ordinary white or vinyl eraser instead of something designed specifically for graphite or charcoal drawings, there’s too much friction between the wax and rubber; as a result, more layers get removed than intended and end up distorting your original lines.
This means that we need something with a higher “grip” (and less movement) in order not only to pick up individual color pigments but also to blend them together.

Are Colored Pencils Erasable?
The short answer is yes, you can erase colored pencil!
You just need the right tools and proper technique. So read on to learn how to remove your mistakes with ease!
As mentioned earlier, it’s crucial that you use a quality eraser if you want anything more than just light smudges of color—otherwise, all that rubbing will likely damage both your drawing material and paper surface beyond repair.
That being said, not every type of rubber is created equal when it comes to removing color pencils from its substrate. If possible, look for an art-specific utility knife.
How to Erase Colored Pencils?
Color Pencil Eraser
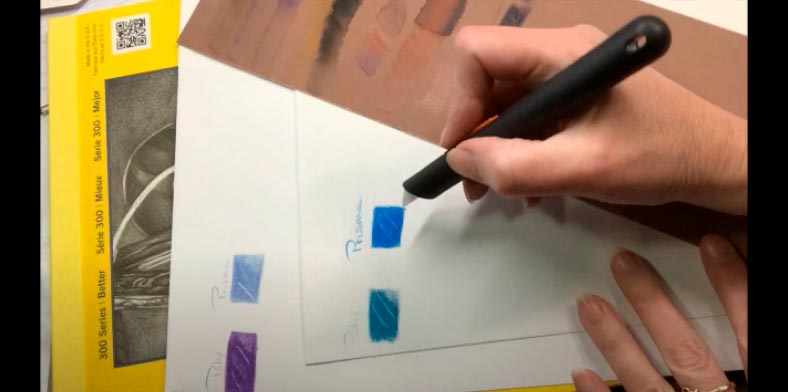
The best kinds of erasers to use when removing colored pencil are called “knives,” which is because they work like blades (or scalpels) in order to pick up and remove tiny bits of pigment.
These types of utensils come in a range of different shapes and sizes; some even have metal or plastic handles that let you get into tight spaces where other tools can’t reach! So if there’s one particular area on your drawing surface that needs attention, look for knives with smaller heads so you don’t accidentally erase more than just the spot you’re trying to fix.

Try using this type of utility knife by doing small circular movements around the target area until all traces of color appear. Then go back and use a clean, dry cloth or tissue to wipe away the pencil dust and debris.
If you want to erase colored pencils fully without leaving any smear marks behind, make sure that all of your eraser shavings are removed before applying another layer of color—otherwise, it may be harder for anything underneath to show through once again after reaching its full saturation point.

- 100% latex-free and smudge-resistant eraser
- Sharp corners and flat face help you erase both details and large areas
Kneaded Eraser
A kneaded rubber eraser will give you the best results, as they’re designed to lift both graphite and charcoal without damaging your paper surface or rendering it too thin.
There are two different types of kneaded erasers—one more appropriate if you don’t want any mess while working on small projects and another more suitable for large areas with lots of debris.
Both varieties have their unique benefits; for example, the former is great for detailed work without any fallout while the latter has a much larger surface area and can be used to cover a large space in one go.
Softer varieties might be better if you’re going through pencils quickly since it’s more affordable than most art-quality brands; just keep in mind that it will wear down faster as well.

Another key difference between regular putty materials and kneaded erasers is that the latter are self-healing, which means they’ll retain their integrity even after intense use.
Pencil Shaped Eraser
Another kind of eraser to look for is a pencil-shaped one, which has the same shape as your average writing utensil.
Although these are typically used by children because they’re small and easy to hold in their hands—which makes them great for coloring books or other projects where you need fine motor skills that involve repetitive movements.
They can also be helpful if you want more control over what you erase since it’s possible to use smaller portions at once rather than going around with a larger utility knife all at once!
In addition, pencil-shaped rubber erasers have been known to work well on even hard surfaces such as chalkboards (as long as there aren’t any thick layers of dust built-up). Just remember not to press too hard, otherwise, you could damage the chalkboard surface in question!

Plastic Eraser & Vinyl Erasers
Another option you can try (if kneaded rubber isn’t available) is using vinyl or plastic eraser; these will definitely get your colored pencil completely erased without any damage to your paper surface.
Vinyl erasers are more lightweight than their plastic counterparts, which makes them better for larger projects where there will be lots of debris to clean up afterward—just keep in mind that they tend to wear down faster as well!
If you have a larger area to cover—or if the target surface is some kind of plastic instead of paper or cardboard—then it’s best to use a vinyl eraser. Even though they’re more expensive, they can be used both dry and wet without any harmful side effects! It will also glide across your drawing board with ease since there won’t be anything sticking on top from previous layers of color.
Masking Tape
Another way to remove colored pencils from paper is by using masking tape.

To do this, simply place the tape on top of the target area until it’s completely covered in color and run a utility knife over it until all of the colors come off.
Then carefully lift up while making sure that all residue has been removed before applying another layer of coloring!
Also, definitely make sure there isn’t too much tape left behind since it could rip the paper itself when removed (which would be especially problematic if you’re working with expensive or high-quality paper).
Electric Eraser
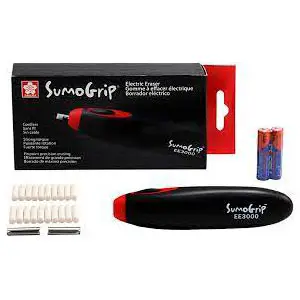
Another tool that works well with colored pencil is the electric eraser, which has its own built-in motor to remove material from your drawing surface.

- Durable, long lasting motor with strong torque
- Pocket sized rounded & contoured handle
These are great if you have a large area to cover since they can do so in mere seconds—plus there’s no need for any kind of carving motion when using one! Instead, just place it on top of the target area and let it work.

However, keep in mind that these are usually very loud due to their motors being relatively small compared to other types of power tools or machinery.
Tips
- Plastic erasers tend to wear down quicker than their rubber counterparts; however, this means that you’ll have less debris leftover after removing your color!
- Vinyl and plastic erasers work best on lighter-colored surfaces. You can use them dry or with a bit of water for easier cleanup afterward.
- For larger areas, use a white vinyl eraser (which comes in either rectangular or triangular shapes) or an electric eraser.
- Be gentle when using any kind of tool – pressing too hard will damage paper and may even leave unwanted smudges on your work.
- To keep your erasing efforts from getting out of control, regularly clean your tools so that the graphite in them doesn’t smear all over everything.
- If too much is erased and it becomes harder to see previous lines then simply adding another layer on top will help bring back some of the darkness. It can also be helpful to come at things from different angles by rotating paper around while looking for areas where more pigment needs to be added.
- Erasers can also work well for drawing new things into your picture or even changing what was originally there. This is especially helpful if you want to make an object look like its reflecting light because adding shading with the side of an eraser will give a texture that looks more realistic than just using colored pencils alone.
You may also like our How to Erase Pen from Paper guide.
Final Words
Keep in mind that mistakes are often opportunities for learning how to erase colored pencil from paper without ruining either your paper or image – so don’t be afraid to experiment with different techniques when trying out new projects!
Use your creativity and problem-solving skills when deciding how best to make corrections. Remember: good artists don’t necessarily draw perfectly from start to finish – they often make adjustments along the way!
