If you’re looking for a creative and relaxing way to spend your free time, why not learn how to draw mandalas? Mandalas are beautiful, intricate designs that can be used for meditation and relaxation. They can also be used as decoration or to represent spiritual concepts. In this article, we’ll provide a comprehensive guide on how to draw mandalas, including tips on choosing the right supplies and techniques for beginners. So grab some paper and pencils, and let’s get started!

What Is a Mandala?
A mandala is a spiritual and ritual symbol in Hinduism and Buddhism. The word “mandala” is derived from the Sanskrit word “manda,” which means “circle.” Mandalas are often used as tools for meditation, prayer, and reflection. They can represent various concepts, such as the universe, the divine, or the mind of a Buddha.
Mandalas can be drawn by hand or created using computer software. However you choose to create them, the process of drawing a mandala can be very therapeutic and rewarding.
The History Of Mandalas
Mandalas have been used for thousands of years. They are believed to have originated in ancient India and were first used by Hindus as an aid for meditation. The earliest known mandalas date back to the Indus Valley Civilization, which existed from about 2500 BCE to 1900 BCE.
The oldest surviving mandala was found on a pottery shard in Baghor, India, and is estimated to be over 4000 years old! It depicts two fish-like creatures surrounded by concentric circles divided into four quadrants. This design can still be seen today on some Hindu temples where it represents the lotus flower – symbolizing purity and beauty – or even more abstract concepts such as creation itself (the universe).
In Western cultures, mandalas have become popular for their therapeutic qualities. They can be used during mindfulness exercises to help calm anxiety levels while bringing the focus back onto a person’s breath.

Benefits Of Creating a Mandala
There are many benefits to creating mandalas, both spiritual and therapeutic. Some of the key benefits include:
Meditation And Prayer
Mandalas can be used as tools for meditation and prayer, helping to focus the mind on a specific concept or goal.
Relaxation And Stress Relief
The process of creating a mandala can be very relaxing and can help to reduce stress levels.
Art Therapy
Creating mandalas has been shown to improve mood and bring about feelings of happiness when people draw them regularly or as part of an art therapy session.
Self-expression
Mandalas are a great way for artists to express their emotions through color, shape, texture, and pattern.
Personal Development
The process of creating a mandala can lead to greater self-awareness, which in turn leads to personal growth and fulfillment.
Mindfulness
Mandalas are a great way for people who suffer from mental illness or addiction issues such as PTSD (Post Traumatic Stress Disorder), depression, anxiety disorders, etc… to practice mindfulness and achieve a state of inner peace.

Choosing the Right Supplies
When it comes to choosing the right supplies, there are no hard and fast rules. The supplies you’ll need for drawing mandalas will vary depending on your preferences and skill level. However, we recommend starting with some basic items that will allow you to easily create simple designs. Here’s what you’ll need:
Paper
A piece of white drawing paper or cardstock will work well for most mandalas. If you’d like to try something more challenging, use a thin sheet of tracing paper instead so that your lines don’t show through as much when overlaying them with colored pencils.
Ruler Or Straight Edge
A ruler or straight edge is helpful for creating evenly spaced designs and ensuring your lines are straight.
Pencils Or Pencil Crayons
Pencils and pencil crayons work well for beginners because they’re easy to erase if you make mistakes while drawing your mandala design! We recommend using something like a mechanical pencil with leads between 0.05 mm and 0.07 mm in thickness for finer detail work or standard #HB graphite sticks which can be sharpened easily if needed during long sessions where erasing becomes necessary!
Colorful Markers, Pens, And Paintbrushes
If you want some color in your design without having the painters’ palette out all over again. Colored paper may also be used instead of white paper but then there’s no erasing option available unless you take care not to apply too much pressure when drawing on colored papers.
That’s it! These are the basic supplies you’ll need to get started. As you become more experienced, you may want to add other items to your supply list, such as colored pencils, charcoal, or pastels.

Create Your Own Mandala
Now that you know a little bit about mandalas, let’s learn how to draw them! The following tips are specifically for beginners, but even experienced artists can find some helpful advice here.
Start In The Centre
When starting a new mandala, it’s best to begin in the center and work your way outwards. This will help you to maintain symmetry and balance in your design.
Use Geometry As a Guide
The use of geometry as a guide can be helpful when drawing mandalas. Some common geometric shapes include squares, triangles, circles, and hexagons. These shapes are often used to create patterns within the design, which helps add visual interest when viewing from afar or up close!
Measure Carefully
It’s important to measure carefully when drawing your mandala. This will help to ensure that your design is symmetrical and looks balanced. One way to do this is by using a ruler or straight edge to draw evenly spaced lines, then dividing the space between each line into equal sections.

Repetition Is the Key
Repetition is a key element in mandala design. Once you’ve got the basic shapes and patterns down, try experimenting with different ways to repeat them throughout your drawing. This will add visual interest and help to create a cohesive finished product.
Don’t Be Afraid To Erase
Erasing mistakes is an important part of the drawing process, so don’t be afraid to do it! If you make a mistake while drawing, take a moment to relax and then erase the offending line(s).
Alternate the Patterns
One way to make your mandala more interesting is to alternate the patterns throughout the design. This can be done by using different geometric shapes, colors, or sizes. Experiment and see what looks best to you!
Leave Negative Space
Negative space is an important part of a good design, so make sure not to fill up all available areas with shapes and patterns. It’s OK if there are some gaps in your mandala! Negative space can help add balance and visual interest to a design, so don’t forget about it when creating yours.
Finish With a Flourish
When finishing your mandala, add a flourish or two for extra decoration. You can use any type o flourish you like or come up with your own design. This is a great way to add your own personal touch to the finished product!
These are the basic tips and techniques you’ll need to get started on drawing your very own mandala. As always, practice makes perfect, so keep at it and have fun!
Mandala Basic Shapes
There are a number of basic shapes that can be used in mandala designs. Here are some examples:
- Petals
- Lines
- Circles
- Dots
- Drops
- Spirals
- Triangles
You don’t have to use all of these shapes in your design, but they can be a good starting point for beginners. Experiment with different combinations and see what you come up with!

Using Grid Lines To Draw Mandalas
Grid lines are an easy way to draw mandalas. You can use them as guidelines for drawing shapes or patterns in your design, especially when creating symmetrical designs such as flowers or other objects that need both sides mirrored exactly alike from one another (like a mandala should).
Grid lines can help you to stay organized and focused while drawing. They also make it easy to correct mistakes since you can simply erase the gridlines once your design is complete and they won’t be visible in the final product.
There are various ways to create gridlines for drawing:
- Use a ruler or other straight edge to draw evenly spaced vertical and horizontal lines on your paper. This will result in a square grid with equally sized squares.
- Draw freehand circles or other shapes on your paper, then connect the dots with evenly spaced lines. This will give you a circular grid (or any other shape) with equally sized circles/units.
Whichever way you choose, make sure the gridlines are drawn lightly so they don’t show up on your design!
Drawing Mandalas With a Compass And Protractor
A compass can be used to draw mandalas. The most basic setup is two pencils of different sizes tied together at one end, but you might also find it helpful if both ends were sharpened into points so that when placed onto paper each would create its own circle.
Tips For Drawing Perfect Circles
- Make sure the points of your compass are nice and sharp so they don’t tear the paper.
- If you’re having trouble drawing a perfect circle, try rotating the compass plate instead of moving the pen around. This will help keep your circles evenly spaced and true to size.
- If you need to erase part of a circle, use a craft knife or other sharp object to carefully cut it out instead of trying to rub it away which might cause smudging.
Mandala Basic Grid Tutorial
Step One
Make a mark at the center of your page. This will be your mandala’s center point. Draw a circle around the point.

Step Two
Draw a line that runs through the middle of your design. You now have two points.

Step Three
Place the compass in one of the points and the pencil in the other. Make two marks on both sides of the circle with a pencil. You can also do this by hand if you’d prefer not to use a compass!

Step Four
Connect the dots. You now have a circle with four equal segments.

Step Five
Reduce the distance between the needle and the pencil, then make another point.

Step Six
Repeat the previous step until you have evenly spaced lines all around the circle (it should look like a spider web). You can divide your circle into as many parts as you want.

Step Seven
Draw a number of different-sized circles according to your mandala design. You can also draw in any additional details or patterns that you’d like to include in your mandala design within these divisions.

That’s it! You’ve now created a basic grid for your mandala. From here, you can begin to fill in the shapes and patterns with whatever colors or designs you desire.
Experiment with different ways of drawing your gridlines – curves, zigzags, etc. – for more varied and intricate mandala designs.
You can also use a protractor to create your mandala’s grid. This will give you a more precise and evenly spaced design.
How To Draw a Mandala Step By Step
Step One: Draw Mandala Guidelines
The first step in drawing a mandala is to draw some basic guidelines. This will help you to create an evenly spaced and symmetrical design.
You can use either a compass or protractor to do this, or simply draw freehand circles.

Step Two: Draw the Center Point
Next, draw the center point of your mandala. This will be the focal point of your design.

Step Three: Draw the First Ring
Draw a ring around the center point, using one of the methods described above. Make sure to keep it evenly spaced and symmetrical.

Step Four: Add More Rings
Repeat step three until you have as many rings as you want in your mandala.

Step Five: Draw the Shapes And Patterns
Now it’s time to start adding in the shapes and mandala patterns. You can use any of the basic shapes described above, or come up with your own designs.

Step Six: Repeat And Experiment
Keep adding shapes and patterns until you’re happy with your mandala. Then, experiment with different ways of drawing the shapes and lines for a more varied design. Have fun!

Step Seven: Finishing Touches
Once you’re happy with your design, add any final touches, such as highlights or shadows.

And that’s it! You’ve now drawn your very own mandala. Congratulations!
How To Draw a Mandala Freehand
Remember that you don’t need any special tools to draw a mandala. You can do it all by hand with just a pencil and paper, or even draw directly onto your computer screen! The only thing you’ll need is some patience (and maybe an eraser).
Step One: Draw the Center Point
The first step is to draw the center point of your mandala. This will be the focal point around which everything else revolves.

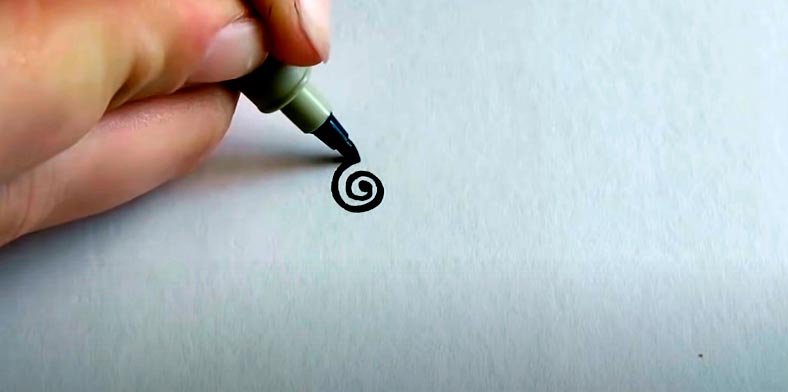
Step Two: Start Drawing a Spiral
The next step is to start drawing a spiral from the center point. This can be either clockwise or counterclockwise (your choice).
Step Three: Draw a Circle Around Your Spiral
After that, draw another circle around your spiral and continue creating more circles.

Step Four: Draw Some Basic Shapes
After drawing your spirals and circles, try adding some shapes around them! For example, you could add petals, drops, or triangles.

Step Five: Add Details And Finishing Touches
The final step is to add details and finishing touches to your mandala. This can include things like dots, leaves, and other decorative elements.

Adding Color To Your Mandalas
Once your mandala is complete, you may want to add some color! This can be done with colored pencils, markers, or even watercolors.
When choosing colors for your design, try to stick with ones that complement each other and create a harmonious overall look. You can also experiment with different color schemes until you find one that you like the best.
Here are a few tips for adding color:
- Start by coloring in the larger areas of the design first, then move on to the smaller details. This will help you avoid accidentally coloring over any areas that you may have already finished.
- Use light colors for the background and darker colors for the foreground to create depth and contrast.
- To blend two colors together, start by coloring in a small area with one color, then add a little bit of the other color on top. Keep blending until you get the desired effect.
- If you make a mistake while coloring, don’t worry! Simply use a clean brush or Q-tip dipped in water to erase the unwanted color. Let it dry completely before adding more color.

Final Tips For Drawing Perfect Mandalas
Now that you know how to draw a mandala, here are a few more tips for creating perfect designs every time:
- Try not to use any rulers or measuring tools when drawing your mandala. This will help the energy flow freely throughout the design. It may take some practice, but eventually, you’ll be able to draw perfectly symmetrical mandalas without any help.
- Take your time while drawing and allow yourself plenty of room for experimentation. The best thing about mandalas is that there are no wrong or right answers! As long as you’re enjoying the process, the final product will be beautiful no matter what it looks like.
- When drawing a mandala, focus on your breathing and try to be in the moment as much as possible. This will help you relax while creating and make sure that you’re not rushing through any steps without thinking them through first.
- Mandalas are meant to be meditative art pieces, so try not to worry too much about making mistakes. If you mess up while coloring or accidentally draw outside of the lines, don’t stress over it! Mistakes are a part of the process and they can be fixed easily by going back over them with more color or adding decorations on top (like dots).
- Mandalas have been used for centuries as a tool for meditation and reflection, so feel free to use them for that purpose as well. If you’re feeling stressed out or need some clarity in your life, try sitting down with a mandala and focusing on your breath. The more you practice, the better you’ll become at using them for personal reflection.
People Also Ask
Final Thoughts
That’s it for our comprehensive guide on how to draw mandalas! We hope these tips and tutorials were helpful, and that you enjoy creating your own beautiful designs.
Learning how to draw mandalas can be a fun and rewarding experience. So grab some paper or fire up your computer, and get creative! It’s time for you to learn how to draw mandalas today! Happy painting!