Watercolor brush pens are a great tool for artists and illustrators. They allow you to create beautiful watercolor effects with ease, and they’re perfect for anyone who wants to add some vibrant color to their work. In this how-to guide, we’ll show you how to use watercolor brush pens in five easy steps!
What Are Watercolor Brush Pens and How Do They Work?
Watercolor brush pens are water-based markers that have bristles on the end instead of a felt tip. This allows for more flexibility in how you create your art, as well as blending between colors and using multiple colors at once to build up opacity.
They are a relatively new art tool that combines the ease of pen and ink with watercolors.
They use special inks that liquefy when you add water to them, and they’re great for adding color to your illustrations (and even some lettering).
It’s easy to create soft gradients, vibrant washes, or striking linework quickly with these tools.
In this guide, we’ll walk through how to get started using them so you can start experimenting on your own!
What You Can Draw With Watercolor Brush Pens
Watercolor brush markers are great for doodling, drawing, illustrating, and coloring. They are an amazing tool that allows you to draw, write or sketch with fluid ink brush strokes similar to how watercolor paint would look on paper. It can be used in all types of illustration work including character design, background art, and comic book style illustrations! They can be used on most surfaces including paper, cardstock, poster board, wood, or canvas.
 Arteza Real Brush Pens, 96 Colors, Flexible Nylon Tips, Coloring Markers in 108-Slot Organizer Case
Check Price
A few ideas of how to use watercolor markers:
- Draw different-sized flowers with the watercolor pen by holding it at an upright angle while applying even pressure on each line you make. Then blend in one area using circular motions (also called stippling). To create some fun variation add more colors then repeat this process once dry occurs. Repeat until the desired look is achieved.
- Try starting with a pencil sketch before adding your final touches! Doodles always come in handy when trying to think of what illustration idea would work.
- Practice drawing different-sized dots in one color to see how you can create a gradient effect with watercolor pens!
- Illustrate your favorite quotes. The great thing about these markers is that they are not permanent so it’s ok if you make mistakes or change your mind halfway through the illustration process.
What you Need:
You don’t need much to get started with watercolor brush pens.
- A set of watercolor brush markers
- A pencil for sketching your illustration idea first
- Watercolor paper. You will need to use thick watercolor paper, and it’s best to avoid using regular printer paper. An absorbent surface is necessary for this technique because you’ll be building up the color gradually on top of each other rather than laying down flat colors.
- Paintbrushes. You will also need some paintbrushes for adding water, but you can improvise with any kind of brush.
- Paper towels/napkins. These will come in handy if you make a mess when applying water.
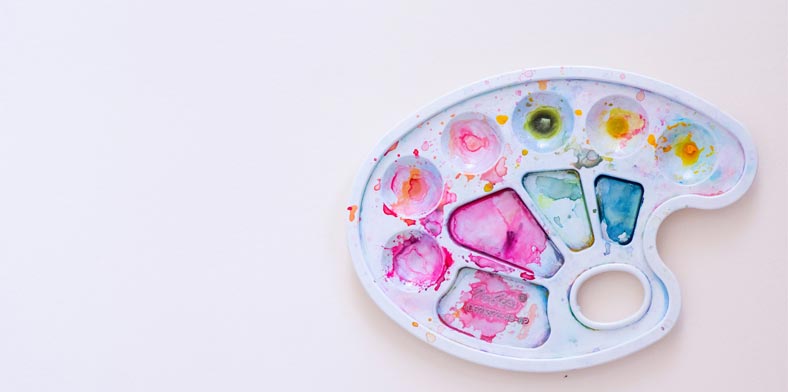
- Paint palette. This helps you mix colors and test how they look on the page before committing to a new wash or gradient of color!
Watercolor Brush Pen Techniques
Dry-on-dry
To use the watercolor brush pen directly on paper, you’ll just need to wet your brush with water and press it onto the page. Letting excess liquid drip off before applying will ensure that there is enough ink in each stroke for a solid color application. This method can be used without an intermediary paintbrush or even straight out of the marker for bolder lines than traditional watercolors allow! You may also choose how much water to apply by using less so as not to over saturate the bristles which would cause them to spread too thin – this provides more control but forces you to work quickly during drying times if working on thick paper. If creating broad swaths of color, move from side-to-side instead of up and down to avoid creating a darker stripe in the middle of your watercolor.

Dry-on-wet
The result is softer and more delicate when drawing pre-moistened paper. When you apply watercolor brush markers directly to pre-moistened paper, you may get a variety of beautiful effects.
You can achieve subtle shading effects in your pieces by applying multiple layers of paint instead of one thick layer. This is perfect for when you want a sense of color without any sharp lines.

Making a blended edge
If you want to make a blended edge, use your water brush and run it along the edges of your watercolors. The texture from the bristles will create a soft transition between colors. So you’ve got a nice blended edge there.
You can vary how much water you apply, which will allow for a wide range of blended color effects!

How to blend colors with watercolor brush markers
To make your technique even more fun, you can dip the watercolor brush pens in ink or paint before starting to color. This way, when you blend colors on paper with a wet brush pen tip, they will mix and create new shades of bright hues. To get this effect, simply use two different colored markers (for example green and yellow) and start coloring blended areas on the piece of paper while the tips still have some moisture left over from the previous work session.
You can also try using one marker cap filled with both washable paints/ink and water so you do not need to keep dipping into another container constantly which makes your whole process more time-consuming.

How to use watercolor brush markers to make gradients
To get a flawless gradient effect, you can use blender pen tips that are specifically made for blending purposes only. To create smooth gradients with watercolor brush pens, simply hold your writing tool perpendicularly to the paper and start coloring over larger areas in circular motions until all colors blend together seamlessly without any visible borders between them. You may also color smaller shapes or lines on top of each other if you want to achieve darker hues by layering different tones one after another but be sure not to let dry previous layers before adding new ones onto it because otherwise, they will mix together into the unpleasant brownish shade.

Tips: How to Create a Beautiful Painting With Watercolor Brush Pens
- Practice making curves and straight lines to get a smooth finish on your painting.
- When applying watercolor to paper, allow it to soak in before adding another layer of color. This will prevent paint from building up and getting muddy looking. If this happens, use a wet wipe or damp cloth and rub across the area where too much paint has been applied until it fades away into lighter colors. Then add more layers as needed (this usually only takes one swipe if done right).
- Be patient when adding coats of watercolor; there is no need to rush through this process!
- When beginning your painting, start off by drawing how you want things to look on paper first with a pencil or pen before moving on to the rest of the process. This makes for an easier time while working on any detail that may get lost otherwise because of how dark watercolor looks compared to how crisp lines come out when using ink pens/pencils/other types of art supplies.

How to care for your new set of watercolor brushes so that they last a long time
- Rinse the brush pen out with water immediately after using it. The ink will dry if you don’t do this and your marker cap may get clogged.
- Always keep the caps on the markers when they’re not in use to preserve them for as long as possible. This also prevents any accidental smudging or leakage that could occur by keeping a wet tip exposed to air for too long, especially while traveling! Never leave them uncapped and standing up because this can cause streaks of color down the barrel of your marker.
Final Thoughts
You have now learned all about watercolor markers, how to use them and how they can work in your art pieces. If you are looking for new ways to experiment with colors, give this guide a try next time you want some creative inspiration! These are just suggestions – the most important thing is that YOU have fun experimenting so that YOU may find what methods work best for YOUR style or piece!! Have fun creating something beautiful today!