
What You Will Need For This Tutorial
Oil Paints
We will be using M. Graham Walnut Oil Paints for this tutorial. It is important to use oil paints because they will allow you to create the translucent look that is essential for painting rain. Also, oil paints have a longer drying time than other types of paint, so you will have more time to work with them.
Paper
We prefer US Art Supply Charcoal Paper Pad for this tutorial because it is a smooth paper that will not buckle when wet. Its size of 9 in. x 12 in. will give you plenty of room to work. It is also important to use paper that is darker in color so that the rain will show up better.
Brushes
We recommend Sable Kolinsky Watercolor Brushes for this tutorial. They are high-quality brushes that will give you the control you need to paint raindrops. You will need three sizes of brushes for this tutorial: small (size 0), medium (size 12), and large (size 20).
How to Paint Rain
First, mix a small amount of white paint with water to create a thin wash. Next, use the brush to dab on the wet wash in short strokes, making sure to overlap each stroke slightly. Keep adding more washes until you’ve achieved the desired effect. It’s best to work quickly as the paint will start to dry fairly quickly.
Getting Started
One of the best ways to start painting rain is to study how light reflects off of wet surfaces. When painting rain, it’s important to create the sense that the viewer is looking at a scene through a window or door, and not simply observing the rain as if it were happening in front of them.
For example, you might use a light blue for objects that are near the viewer, and a darker blue for objects that are in the distance. You can also experiment with different brushstrokes to create texture and depth in your painting.
How to Paint Rain in Oil
1. Sketch Out Your Painting
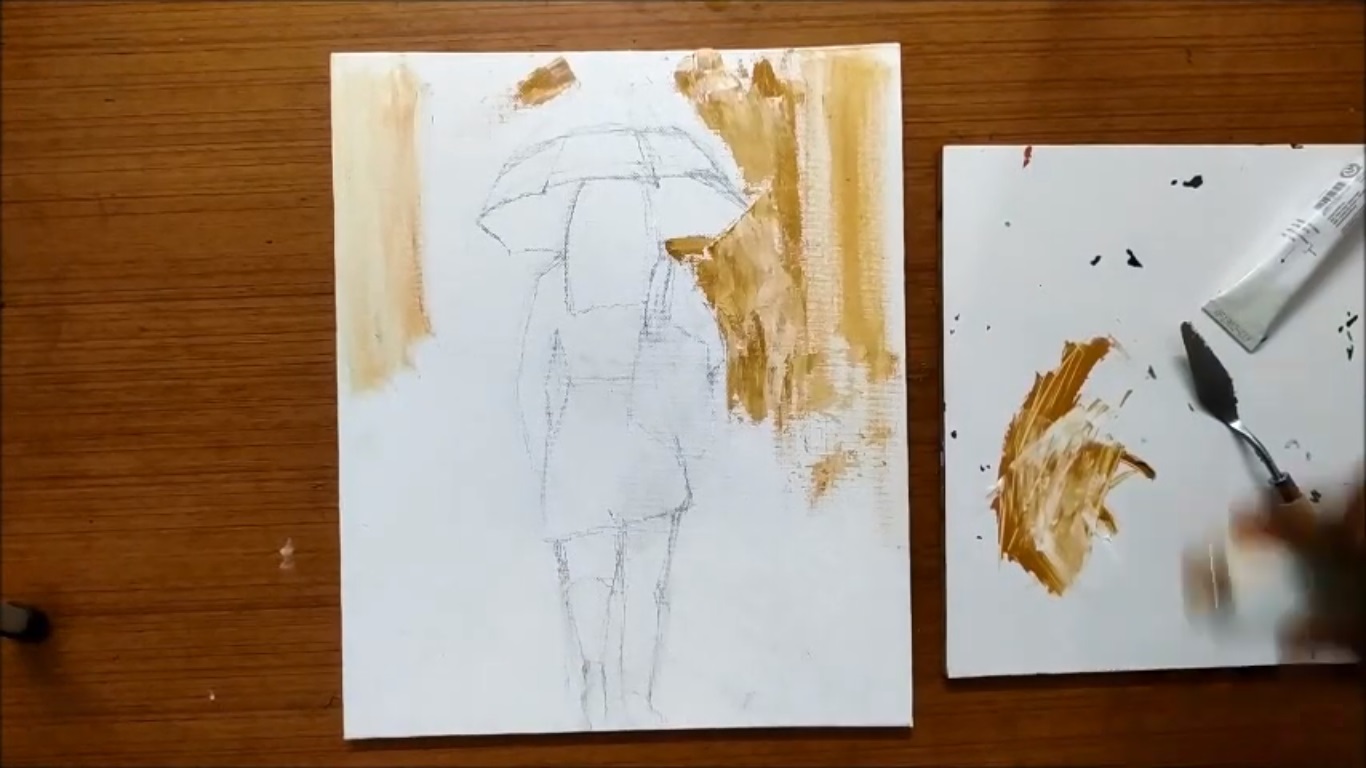
Before you start painting, it’s always a good idea to sketch out your composition. This will help you plan the placement of your elements and get a feel for the overall design. For this rain painting, I wanted to keep things simple and focused on the rain itself. So I sketched out a few basic shapes to represent the raindrops falling from the sky. To make the drawing more interesting I decided to draw a girl with an umbrella in the center of the paper.

2. Paint the Background
Once you have your sketch, it’s time to start painting. Begin by painting the background color of your choice. I opted for a light brown to represent the sky.
3. Add the First Layer of Rain
Once the background is dry, it’s time to start adding the rain. For this first layer, I used a light blue color. This will represent the rain that is furthest away from us and falling at a slower rate. To paint the rain, simply dab your brush onto the canvas to create small dots. These can be any size, but I kept mine on the smaller side.

4. Paint the Girl With the Umbrella
Now that the first layer of rain is complete, it’s time to add the girl with the umbrella. I started by sketching out her basic shape with a pencil. Once I was happy with the sketch, I began painting her in red color. I used a small brush for the details and a larger brush for the overall shape.
To do this, I used a dark blue color for the shadowed areas and a light blue for the highlights. I also added some water droplets falling from the umbrella by painting small dots of white.

5. Add the Second Layer of Rain
Now it’s time to add the second layer of rain. For this layer, I used a darker blue color. This will represent the rain that is closer to us and falling at a faster rate. I also made the raindrops a little bit bigger.
I started by adding some of the darker blue paint to my palette and then adding water until it was the consistency of milk. Then I loaded my brush with paint and added it to the top of the painting, letting it flow down the page. I repeated this process until I was happy with the amount of rain in the painting. Then I set it aside to dry.

6. Add the Third Layer of Rain
For the third and final layer of rain, I used an even darker blue color. This represented the rain that was falling the fastest and was the closest to us. I added this paint in the same way as the previous two layers, using a small brush to create tiny lines. Once again, I tried to vary the thickness of the lines and keep them random.

7. Add Some Mist
To add some mist to the painting, I used a very light blue color and a large brush. I added the paint in random areas around the rain, using gentle strokes. I wanted the mist to be subtle so I didn’t add too much of it.

8. Add Highlights
To add highlights to the rain, I used white paint and a small brush. I added the paint to the top of each raindrop, making sure not to cover up the previous layers of paint. I also added a few highlights to the mist for extra realism.

9. Add Shadows
To add shadows, I used a dark blue color and a small brush. I added the paint to the bottom of each raindrop, making sure not to cover up the previous layers of paint. I also added a few shadows to the mist for extra realism.

10. Let It Dry and Enjoy Your Painting!
Once you’ve added all the layers of paint, let your painting dry completely. Then step back and enjoy your handiwork! I hope you enjoyed this tutorial on how to paint rain in oil.

People Also Ask
How to paint rain easy?
One way to paint rain is to use a fan brush and lightly dip it into white paint. Hold the brush sideways and slowly sweep it across the surface of the canvas in the direction of the falling rain. For heavier rain, you can add more layers of white paint. You can also try adding some light blue or other colors to create a more varied effect. experiment and have fun with it!
How do you make a painting look rainy?
To make a painting look rainy, you can first sketch out the basic scene with a pencil on paper. Once the drawing is complete, begin to paint in the sky with various shades of blue and purple. Add some clouds for realism and then use a thin brush to paint rain droplets onto the canvas. Finally, highlights can be added to create a realistic effect.
How do you paint colorful rain?
The process of painting colorful rain begins with the mixing of various colors together to create the desired shade. Once the color is mixed, it is then thinned with water and applied to the canvas in the desired pattern. While the paint is still wet, small amounts of different colors are added to create specks of rain. Finally, a protective sealant is applied to keep the painting from fading over time.
How do you paint rain puddles?
First, mix some white and blue paint together to create a light purple color. Then, using a small brush, lightly paint the desired shape of your rain puddle onto a sheet of paper. Leave it to dry completely. Once it's dry, cut out the shape of your rain puddle and take it outside. Hold it up against the ground and pour water over it - you'll see the purple color 'rain' inside the puddle!
How to paint rainy window?
Congratulations and Keep It Up!
Rain is definitely one of the most beautiful aspects of nature. In this tutorial, we learned how to paint realistic rain in oil. The process can be a little time-consuming, but it’s definitely worth it in the end. I hope you enjoyed this tutorial and will take the time to experiment with different colors and techniques to create your own unique rain paintings.