
What You Will Need For This Tutorial
Pencils
We will be using a variety of pencils for this tutorial, ranging from HB to B. This is to create different shades and textures in the drawing. We prefer to use Castle Art Pencil Set.
Paper
We recommend using a thicker, textured paper such as Strathmore, 400 Series Sketch Pad, 9″x12″. It can handle multiple layers and erase without tearing. Its size also allows for larger drawings.
Eraser
We like to have both a kneaded and regular eraser on hand for this tutorial. The kneaded eraser is great for light shading and erasing small mistakes, while the regular eraser works well for larger areas.
How to Draw Horse
To draw a horse, start by sketching out its basic shape, making sure to add the neck, head, and body. Next, add in the legs and hooves. Finally, detail the horse’s coat and mane/tail. When finished, make any final adjustments as needed.
Getting Started
One thing that’s important when starting is to familiarize yourself with the basic shapes that horses comprise. Horses are generally triangular, with a large triangle for the body, a smaller triangle for the head, and a pointed triangle for the tail.
Remember to always use reference material when drawing animals as they can be quite complex with a lot of subtle features. It often helps to draw an outline of the animal first and then gradually fill in the details. Use light shading to give your horse some depth and realism.
How to Draw Horse Step by Step
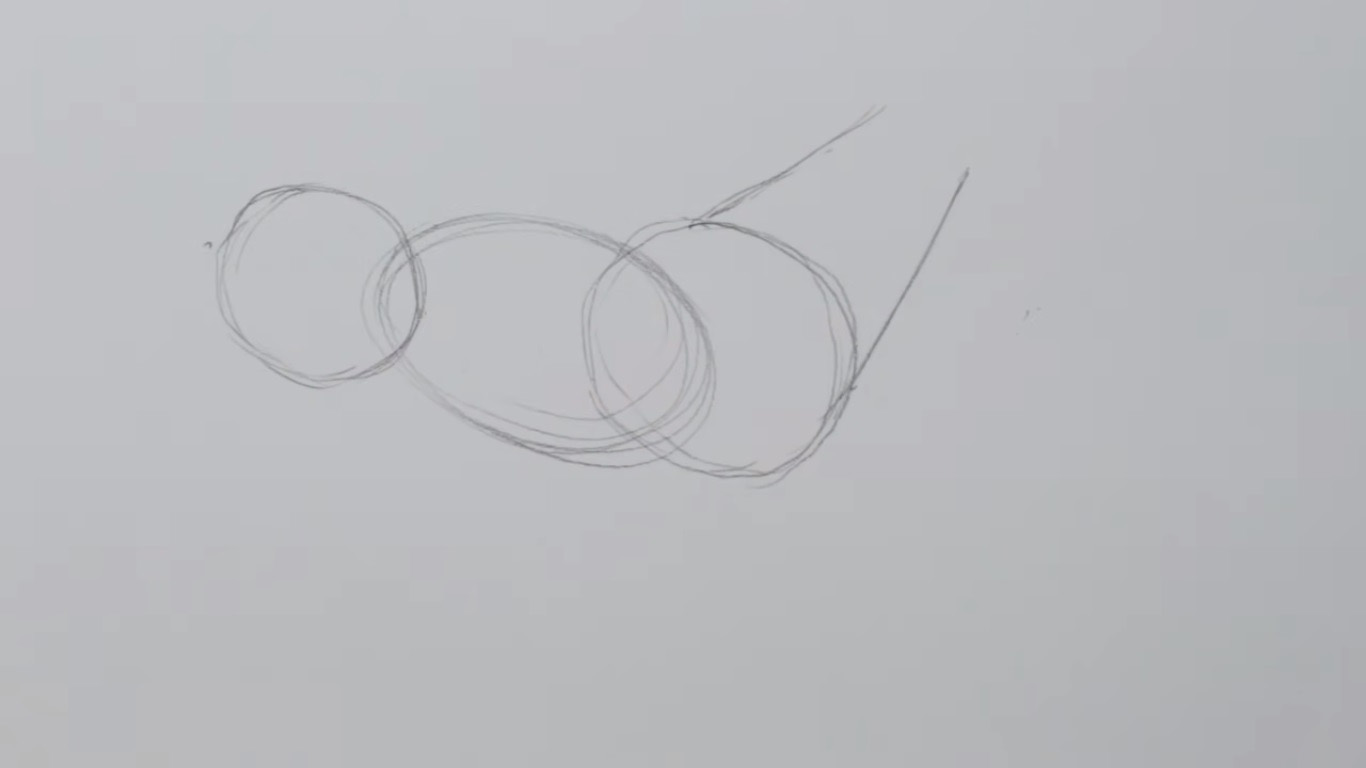
1. Draw the Torso
To draw the horse’s torso, start by drawing three oval shapes in a row. The middle oval should be slightly larger than the others. This will form the horse’s barrel.

2. Draw the Neck
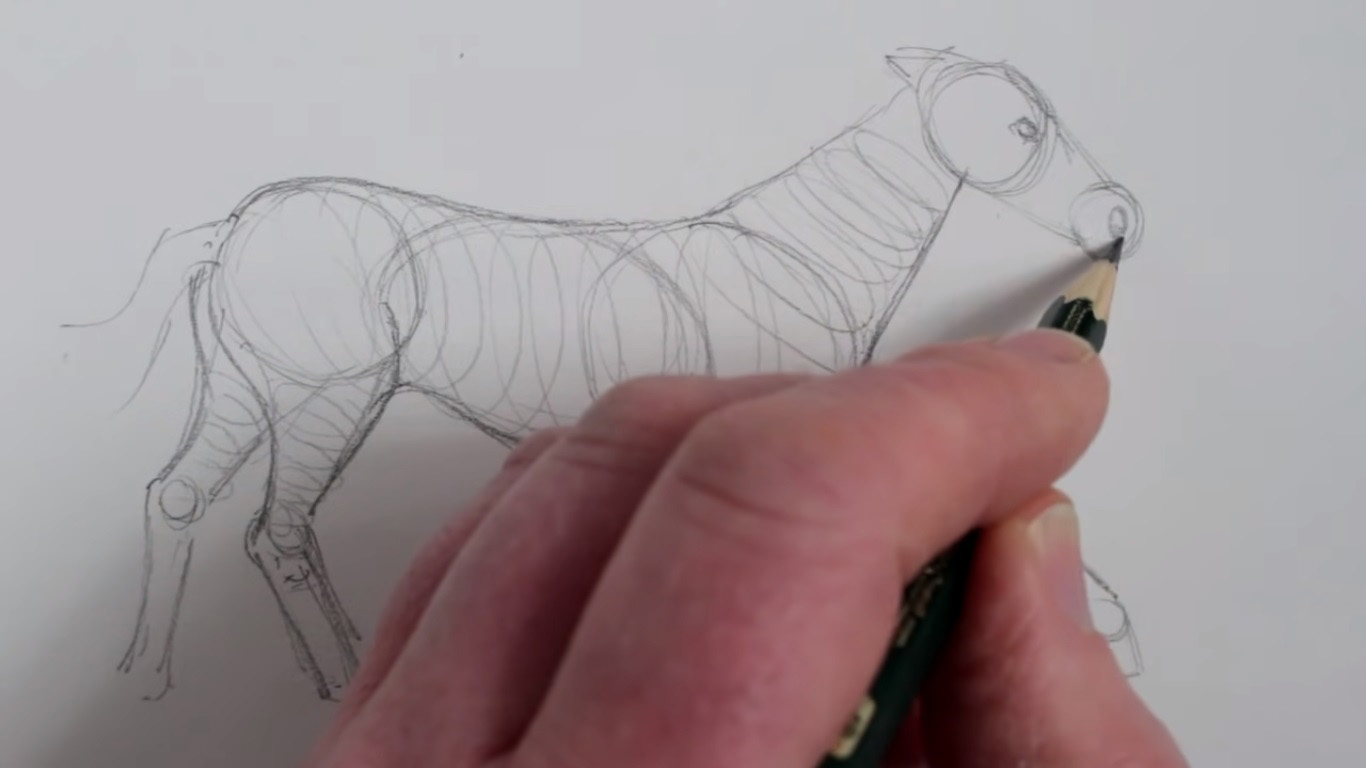
Then, draw a long, curved line extending from the top oval. This will form the horse’s neck. Also, draw two small lines at the base of the neck for the chest.
3. Draw the Head
Next, draw two circles for the muzzle. Then connect them as shown below. If you want to make the horse’s head appear more rounded, add a small curved line at the top of the muzzle.

4. Draw the Front Legs
Draw two long, angled lines extending from the chest. These will form the horse’s front legs. At the end of each line, draw a small circle for the hooves.

5. Draw the Hindquarters and Back Legs
Next, draw a long, curved line extending from the barrel to the horse’s hindquarters. Then, draw two long, angled lines extending from the hindquarters to the back legs. In the end, draw small circles for the hooves.

6. Draw the Tail
To draw the horse’s tail, simply extend a long, curved line from the hindquarters.

7. Add Details and Erase Any Unnecessary Lines
Now, add more detail to the horse by drawing small lines for the mane and tail. Then, erase any extra lines or shapes that may be visible.

8. Add Eyes and Nose
To finish off the horse’s face, draw two small circles for the eyes and a small triangle for the nose.
9. Shade the Drawing
To add depth to the drawing, shade in various sections using short strokes.

10. Add Shadows and Highlights
Finally, add shadows and highlights to give the drawing a more realistic look. It’s always a good idea to add a few final touches, like erasing any stray pencil marks or adding more small details. Also, don’t forget to sign your work!

11. Add Color (Optional)
For a finishing touch, you can add color to your drawing using colored pencils or markers. If you do choose to color your drawing, be sure to blend and shade appropriately for a more realistic result.

How to Draw Horse Head
1. Draw a Rectangle
To start, draw a rectangle at the top of your paper. This will serve as the horse’s head. If you want to add more accuracy, make one side of the rectangle slightly longer than the other.

2. Add Three Lines for the Nose
Next, draw three lines as a guide for the horse’s nose. The middle line should be the longest, with the two on either side being shorter.

3. Draw a Semicircle for the Jaw
Below the nose, draw a semicircle for the horse’s jaw. This should connect to the bottom of the rectangle from Step One.

4. Mark the Eyes and Ears
On either side of the horse’s head, mark where the eyes will go. Make sure they are placed higher on the head than you may think – remember, horses have large eyes. Also, mark where the ears will go – they should be slightly above and behind the eyes.

5. Draw Nostril and Mouth
Within the nose guide from Step Two, draw a small nostril. Then, draw a curved line below the horse’s mouth.

6. Add Detail to the Eyes and Ears
Add more detail to the eyes by drawing small circles within them. Then, draw the inside of the ears using triangle shapes.

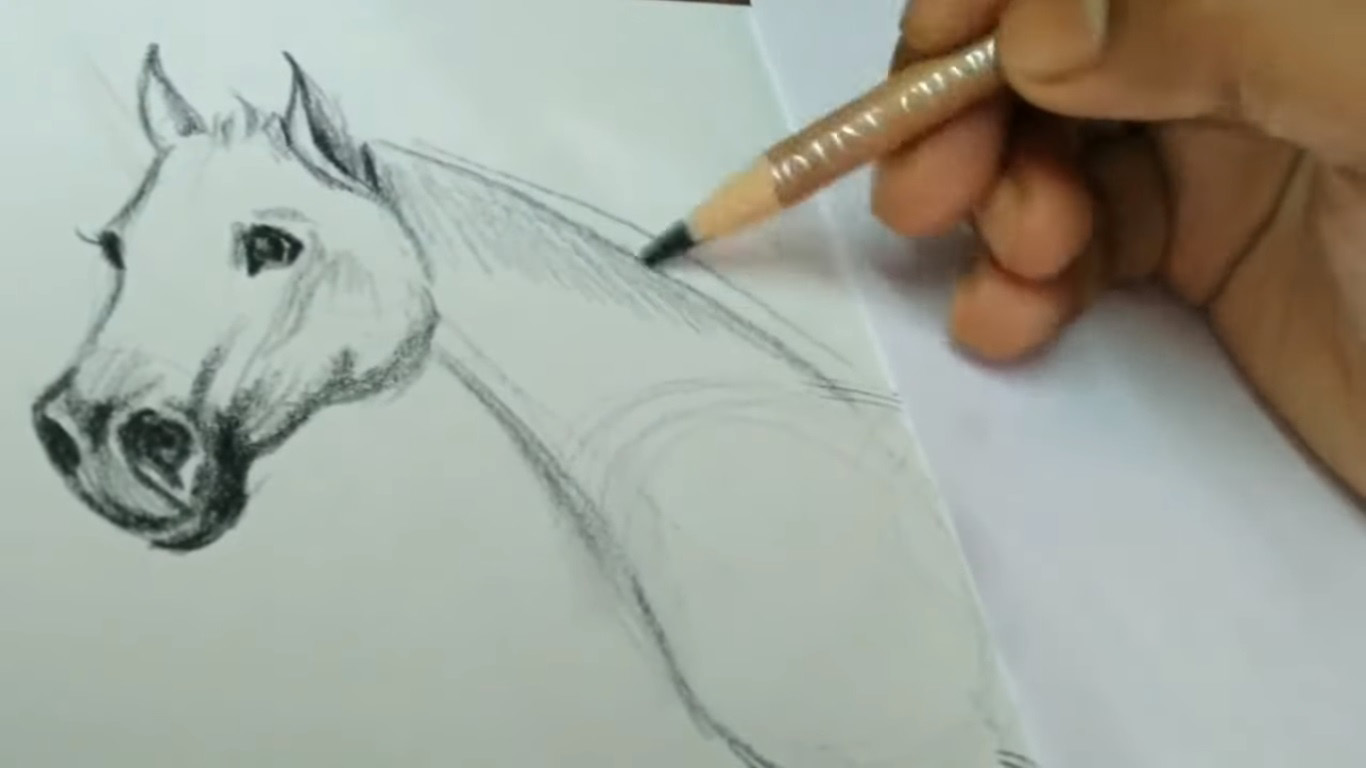
7. Draw the Neck
Extend the horse’s neck downward from the jaw, tapering it as it goes. Add some wavy lines along the neck for muscle definition.

8. Erase Unnecessary Lines
Take a moment to erase any unnecessary lines from your drawing. It’s important to have clean and precise lines for your drawing to appear more realistic.

9. Circle the Remaining Lines
Finally, go over any remaining lines with a darker stroke to define them. If you wish, you can also add shading to give the drawing more dimension.

10. Add Shading
Then, add shading to your drawing for a more realistic effect. Be sure to pay attention to where the light would hit the horse’s body and shade accordingly.

11. Add Shadows and Highlights
Finally, finish off your drawing by adding shadows and highlights to give it, even more, depth and dimension. If you want, you can even add a background or scenery to complete your drawing.

12. Add Color (Optional)
You can also add color to your drawing for a more dynamic finish (if desired). Use different shades and hues to bring the horse to life. And there you have it – a completed drawing of a horse’s head! Keep practicing and soon enough, you’ll be able to draw one from memory.

How to Draw a Horse Running
1. Sketch the Basic Shapes
To begin, lightly sketch the main shapes of the horse’s body using circles and ovals. These will serve as guidelines for the rest of your drawing.

2. Draw the Horse’s Head and Neck
Next, draw the horse’s head and neck using the basic shapes as guides. Don’t forget to add the ears, mane, and facial features.

3. Draw the Horse’s Body and Legs
Now it’s time to draw the horse’s body and legs. Remember to add muscles and definition as well as hooves at the ends of each leg.

4. Add the Tail
Use long, flowing lines to add the horse’s tail. Don’t forget to add any hair or tufts at the end.

5. Sketch in the Mane and Fur Details
Using short, sketchy lines, add the horse’s mane and any fur details on the body.
6. Erase Any Unnecessary Lines and Add Shading
Clean up your drawing by erasing any unnecessary guidelines and lightly shading the horse’s form to give it more dimension.

7. Refine Your Drawing and Add Details
Take another look at your drawing and carefully refine any areas that need it. Then, add any final details such as individual hairs or markings on the horse’s coat.

8. Shade and Blend for a More Realistic Look
Using different tones of pencil, and shade in the horse to give it a more realistic appearance. Blend the shading with an eraser or paper blending tool for a smoother look.

9. Add the Finishing Touches
Finally, sign your artwork and add any background elements if desired. Congratulations – you have successfully drawn a horse!

People Also Ask
How to draw a horse for adults?
Begin by drawing a large, oval shape for the body. Next, draw two smaller ovals for the head and neck. Then, add four lines for the legs and hooves. Finally, add detail to the face and mane/tail. You can use any type of stroke to create your horse's coat - smooth or wavy lines work well. Practice drawing a few different horses until you get comfortable with this approach, then experiment with adding different features and poses.
How to draw a realistic horse?
There are a few things to keep in mind when drawing a realistic horse. First, horses come in a variety of shapes and sizes, so it's important to observe your subject closely and capture its unique characteristics. Additionally, horses are covered in fur (or hair), so pay close attention to the texture of the coat and use appropriate shading to create the illusion of depth and realism. And finally, always be sure to sketch lightly at first, as you can always go back and darken lines later.
How to draw horse easy?
There isn't one definitive answer to this question, as the best way to draw a horse may vary depending on your level of experience and personal preference. However, some tips for drawing a horse easily may include studying reference photos or drawings of horses, breaking the body of the horse down into simple shapes, and using basic lines and curves to create the outline of the horse. Additionally, it can be helpful to practice shading and adding details to your drawings to make them look more realistic.
How do you draw an easy horse face?
There are a few different ways to draw an easy horse face. One way is to start by drawing a basic oval, and then dividing it in half with a vertical line. Next, draw the head and neck of the horse using curved lines. Finally, add details such as the eyes, nose, and mouth. Another way to draw a horse face is to start by drawing two small circles for the eyes, followed by a large oval for the head. Next, add the outline of the nose and mouth, and then finish up by drawing the ears and mane. Whichever method you choose, always remember to use smooth curves for a more realistic appearance. And be sure to practice often for the best results!
How do you draw a standing horse?
Horses are interesting creatures because they have a lot of muscle in their hindquarters that allows them to stand and support their weight on just their hind legs. When drawing a standing horse, it's important to give them plenty of mass in their back end and make sure that they're leaning slightly forward. Start by drawing the head and neck, which should be elongated and curved. Next, draw the barrel-shaped body and the large haunches. The forelegs should be thin and muscular, while the hind legs should be thick and sturdy. Finish by adding the details to the head, neck, body, and legs.
How do I draw a realistic horse's mane?
There are a few things you can do to make your horse's mane look more realistic. One is to use two different colors for the mane - light color and a dark color. This will help give it more depth and realism. Another thing you can do is add some texture to the mane. To do this, use a toothbrush or other stiff brush to brush against the hair in the opposite direction of how it grows. This will help create the illusion of individual hairs, which is important for realism. Finally, use a light source (like sunlight) to help highlight the individual hairs in the mane and make them stand out even more.
Congratulations and Keep It Up!
Drawing a horse can be a fun and challenging project, no matter what your skill level. If you’re just starting out, we recommend following the step-by-step guide above to help you get comfortable with the process. Once you’ve got the basics down, feel free to experiment and add your flair to your drawings. Don’t forget to practice regularly – the more you draw, the better you’ll get!