Any artist will tell you that learning to draw hands is one of the hardest skills to learn. However, with enough practice, it is definitely a skill that you can master with ease. I know that when I was just starting out, hands were a nuisance that was next to impossible. I would try anything to avoid drawing them – but that wasn’t going to make me any better as an artist. It took some force, but the more I drew hands, the easier that it became for me to draw hands.

Like all things, progress won’t be instantaneous. It will take time and effort to perfect drawing hands. Also like all learned skills, it is often easier to take the lessons step by step and slowly expand into more complex hand positions. It’s a saying that’s tired but true: the more that you practice, the better that you will be at drawing hands. I find that the easiest way to start drawing hands is to learn how to draw a fist.
What You Will Need For This Tutorial
References − Whether you stare at your own fist or a variety of photos of fists of other people, a reference is the number one tool for learning the lines of hands. You can see exactly how the fingers curl when the fist is clenched and better replicate the image in your own drawing. References are a handy tool for many things in art, but particularly in drawing hands in my opinion. While your own hand will get you very far in terms of references, it is also important to have a few pictures on hand in the hopes of avoiding the chance that your brain gets confused and wants you to draw a replica of your non-drawing hand in the opposite place of where it should go. Even the best artist will sometimes fall victim to human error.
Drawing Materials − The exact materials that you will need will end up varying according to the medium you prefer using when you draw. I recommend starting simple and learning the basic lines and shading of the hand. Pastels, paints, gouache, and colored pencils are things that you can work in later, once you feel more confident in how you draw hands and fists. It can also be tempting to use color to disguise some smaller mistakes when drawing, so to get the maximum benefit from this tutorial I recommend holding off on all embellishment beyond shading. I personally alternate between drawing digitally and drawing in a more ‘traditional’ manner.
Traditional
Traditional art is often considered drawing on paper with a pencil or some other form of media. This is probably the easiest material set to get your hands on because all you will need is a sheet of paper and a pencil. The type of paper and pencil is entirely up to you. Whether you choose to go with more artistically skewed brands or with whatever you happen to find laying around the house, traditional paper and pencil art are one of the most common styles to learn in.
Materials You Will Need For Traditional Drawing
- Paper
- Pencil
- Eraser
- Drawing Surface
 Strathmore 400 Series Sketch Paper
- Fine tooth surface grabs dry media and stands up to repeated erasures and reworking
- Heavy chipboard backing
Getting Started
There is no single end all be all way to draw anything in this world, but through this tutorial, I hope to provide you with several different steps by step guides to practicing and perfecting how you draw a fist. I’ve arranged them in an order that I believe to range from the easiest to the hardest fist to draw. Your experience might be different, but I’m sure you’ll find what you’re looking for below.
Not enough for you? Check this book by Burne Hogarth:

- Written by “Michaelangelo of the comic strip”
- A lot of insight about the anatomy and proportions of the hands
How To Draw A Cartoon Fist
Perhaps the easiest way to gain a level of confidence with drawing fists is to leave the realm of the realistic and focus on drawing cartoon fists. It will provide you more room to mess up with less reason to feel guilty about it and beat yourself up over the little mistakes that all artists make from time to time. This is perhaps the easiest way to draw a fist, with the fewest steps.
1. Let Go Of Reality
The most important thing to remember is that you are drawing a fist that is cartoony in nature (like in comics). There is no need to worry about making your fists look realistic – after all, we’ve all seen the shorts where the cartoon character blows up their fist by way of their thumb and really socks it to them. you don’t have to worry about perfection with cartoons because by nature the style is a little goofy.

2. Start Drawing The Fist
Drawing a cartoon fist can feel a little reminiscent of when you were little and trying to trace around your own hand. Your cartoon fist might look a little bubbly and not quite human but that’s okay. When it comes to cartoons, the proportion is not something that you have to worry about as much. Start with a bold outline of the fist and fingers and go from there.

3. Add The Embellishments
Your outline might not look much like a fist until you add a little bit of cartoonish embellishment. The wrist is always a good choice, as well as some light shading along with the fist. Minor details like popped veins will help you to define the emotion behind your cartoon fist, and help to define the overall mood of your character.

How To Draw A Clenched Fist: Back View
Viewing a fist from the back of your hand will easily show you why this is an excellent step into more realistic fists after practicing a couple of cartoon fists. It will help you to start seeing a pattern that will help make the rest of your fist drawing incredibly easy. When you look at the back of your fist, you will be able to start viewing your hand as a series of shapes and curves.
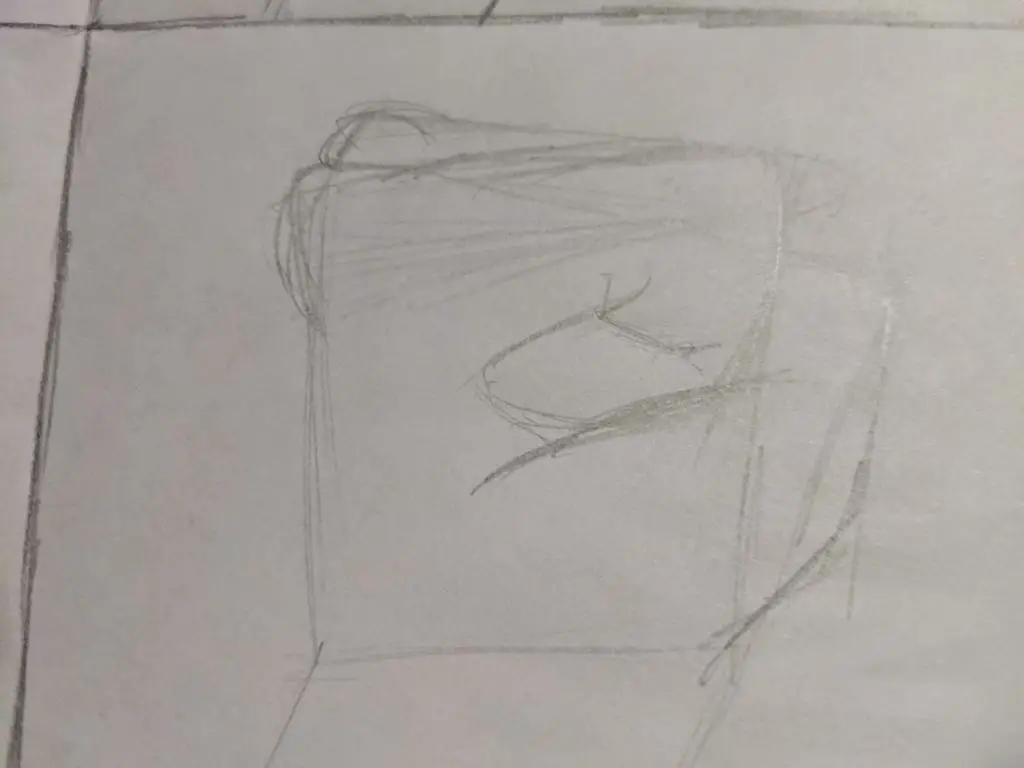
1. Draw The Main Part Of Your Fist
You’re essentially drawing the back of your hand and little else in this step. The best part of this is: The back of a hand is essentially a trapezoid in shape. The exact dimensions might vary, but in the end, you will find a great variety of quadrilaterals in your hand. For now, we are merely focusing on the trapezoid that forms the main part of your hand.

2.Draw Your Knuckles
Your knuckles are not quadrilaterals, but tiny triangles with rounded corners. They also aren’t all the same exact height all the time. Place for rounded triangles along the top of your fist and you will start to see the basic outline taking shape. You don’t have to worry about stray lines right now if drawing them helps you to get to a fist that you enjoy looking at and feel proud of creating. Don’t worry about drawing your thumb right now either, because we will be doing that in the next step.

3. Draw Your Thumb
The thumb can range from a rounded triangle to an oddly shaped quadrilateral. It can even disappear entirely from view! It all depends on how exactly the fist is clenched. The placement of the thumb can do a lot to depict the mood of the fist. Take the time and play around with the thumb, and observe how the position changes the mood that the fist puts out.

4. Clean-Up Time!
We have a mess of lines by now, don’t we? Trapezoids, triangles, and quadrilaterals gave us the shape, but it’s time to make sure that the lines that don’t matter to the shape of the fist are removed from the end product. Pay close attention to the overlaps, as some of those lines do provide key details of the fist. This is also the moment where you can add soft curves to help evoke a more fleshy feel to your drawing, rather than a stiff one.

 Faber-Castell Kneaded Erasers
- The perfect drawing eraser choice for artists
- Extremely kneadable and absorbent
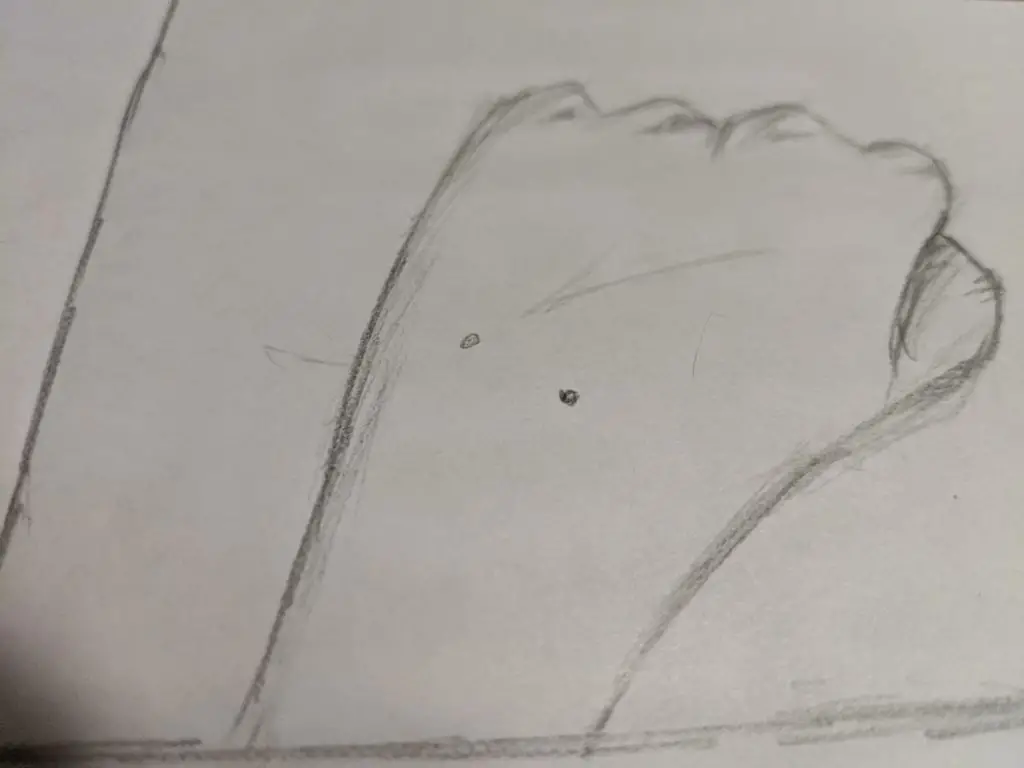
5. Add More Details!
At this point, you’re ready to add shading and details to your fist. Is there a scar or freckle on the hand? How tightly is the fist clenched, and how much of the knuckle is actually bulging out? Can you see veins through the skin of the fist? There are a variety of details that will help to bring your fist to life. At this point, the drawing is in your very capable hands, and anything that you choose to add to it is in the realm of artistic licensing.
How To Draw A Clenched Fist: Top View
Drawing a fist coming at the viewer of the drawing can be a really dynamic way to arrange the picture. There are a few more details when compared to drawing the back of your fists, but this is another easy angle to draw – even if you do see more of your fingers from this angle. There’s no reason to fear, you just have to look for the shapes.
1. Draw The Fingers of Your Hand
Your fingers are a little like a rectangle that is slightly askew. My first instinct when looking at my fist from this angle is that they are a rectangle containing four rectangles that reduce ever so slightly in size. For now, we aren’t going to worry about the knuckles, because there’s one more important feature that we can see.

2. Draw Your Thumb
You have an excellent view of your thumb from this angle. Don’t worry about the fine details, just make sure that the general shape is there for the time being. Your thumb is a little like a chunky diamond or oval from this angle, hidden slightly by your other four fingers.

3. Draw Your Knuckles
This is the time to round off all your knuckles and the tip of your thumb. You can’t really see the tips of any other fingers from this angle, but its important to make sure that you line all of the peaks and valleys of your knuckles at this point because we’re almost at the end of this angle.

4. Clean Up The Lines
Stray lines are a boon when you’re trying to get the shape right, but they are one of the first things you need to deal with when finishing up your drawing of a fist from the top. This is especially important this time as we have a lot to do in the next step on this guide.

 Castle Art Supplies Pencils and Sketch Set
- Professional art pencil set
- 40 total pieces, including graphite, charcoal and pastel pencils
5. Add The Details!
From this angle, we can see a fair bit of detail and shading on our hands. It’s time to bring your drawing to life by adding all of those little details that make hands unique and tricky to draw. Shadows play along the lines separating all of your fingers and will help to give your thumb the definition needed to suggest depth that you might be worried is missing. You also have a fantastic view of a variety of creases in your knuckles as well as your thumbnail! Take the time to give life to the fist, and include any scars or freckles that might be found on your fingers.

How To Draw A Clenched Fist: Side View
From the side, you can see a lot of the folds of your fingers in a clenched fist. On the surface, it might look a little intimidating, but you can easily master this angle of drawing fists. After all, you’ve already come this far, right? What’s a little more challenge when you’ve already managed to prove yourself determined? Take a breath, and pick up your pencil. We’re going to draw a fist from the side.
1. Draw The Main Part Of Your Hand
This is another trapezoid shape. Don’t worry about the inside creases caused by the curl of your fingers. It’s always quickest to get the roughest sense of the fist before piling all the details and pieces that help to make a hand seem real.

2. Draw Your Fingers And Thumb
Only focus on the outside fingers for the moment. You don’t have to go into great detail just yet, especially in regard to the inner curl of the fingers. A few shallow rectangles and one chunky rectangle will bring the fingers and thumb into view with ease. Leave the knuckles alone for the time being, because we’re just getting the roughest feeling for the fist as viewed from the side.

3. Draw Your Inner Finger
The inner curl of the finger can look daunting, but it’s really just a jagged and angular spiral. There are a number of little offshoots along the spiral, but we can save those for the final step of the guide where we add all of the details that help to make the hand look fleshy and alive. For now, a rough and slightly spurred spiral with multiple sharp corners is all we need to worry about.

4. Draw Your Knuckles
Round off the knuckles and define where your knuckles sit. This step will really finalize the overall outline of the fist and help you to see what parts need a little extra attention and adjusting. This is also a good opportunity to add the soft curves of the flesh on your fingers that has been pressed out of place by clenching your fist.
5. Clean Up The Lines
This is probably the best step in the process. Removing all of those extraneous lines will help to make your fist look so much better. Drawing a fist can be stressful and more often than not an artist will hate their work, but cleaning up the lines will bring you that brief glimmer of “Wow, I really can draw fists!” cleaning up the lines is also a good opportunity to fix any details that bother you, and make the final outline sharp and eye-catching.

6. Add The Details!
You see a lot of squishy flesh when your hand is like this. There’s plenty of shading and wrinkles that you need to add in order to bring your drawing to life. While you can’t see as many wrinkles on your knuckles from this angle, you can see a few that help to define the hand. The inner spiral of your clenched finger is especially riddled with wrinkles though, and you will likely spend a lot of time perfecting the details of that area.

How To Draw A Clenched Fist: Front View
This is easily the most difficult angle to draw a fist from in my opinion. However, it is an incredibly dynamic angle and can add a lot when you’re staging a picture in your mind. While the vision in the mind never makes it to the paper in quite the same way, it won’t be because you aren’t capable as an artist. After all, you’re willing to try a challenging angle to create a great picture.
1. Draw The Main Shape Of The Fist
From the front, the overall shape of your hand is that of a pentagon. It might be difficult to ignore all the details that you can see, but we are going to build up those details over the course of this tutorial. We’re merely laying the frame of the fist in the step. The details will build up with ease.

2. Draw The Fingers
There’s a lot of layers of details from this angle, but the first one that we’re going to work on is that of the fingers. Thankfully, the fingers are still delightful little rectangles that appear to decrease in size ever so slightly. There’s a curve to the layout of the fingers from this angle though, so instead of being four rectangles in a larger rectangle, they are four rectangles in a very skinny trapezoid that is laying on its side. Your fingers take up half of the pentagon shape we already drew.

3. Draw Your Thumb
Next comes the thumb, which is in the shape of a triangle this time. It sits over about half of the fingers and blocks them from view. The portion of your thumb the meets your palm is like a rectangle the takes up one of the sides of the pentagon. The thumb should not touch the portion of the pentagon that is directly parallel to the line you followed to create the top of the fingers.

4. Draw Your Knuckles
Your knuckles aren’t rounded triangles this time. In fact, other than the bend in your thumb, your knuckles are more like little trapezoids. It’s probably very easy to top off your rectangle fingers with this little detail. Don’t worry about the knuckles hidden behind the thumb, because there’s no reason to detail what you can’t actually see.

5. Clean Up The Lines
Everything so far has been about getting the outline of the hand perfected, and finally, we’re at the part where we clean up all of those extraneous lines and truly see the outline of a fist as viewed from the front. As you clean up your lines, you can also take the opportunity to soften and curves and angles you might need to the really help define the outline and dimensions of the fist.

6. Add The Details!
There are so many shadows from this angle that it’s going to be pretty easy to conceal any little hiccups that you might not feel confident and happy about. That is the beauty of dealing with shadows and details after all: anything that you aren’t sure of can be turned into a nice little detail or shadow, or hidden by adding details in just the right way. There are a lot of wrinkles and creases from this angle, so there is plenty of opportunities to turn a mistake into a feature in your drawing.

Congratulations and Keep It Up!
Simply by looking up this tutorial, you are already on your way to being better at drawing hands. Hopefully, you enjoyed this tutorial and it taught you something that will hopefully make your art even better than it already is. I know that drawing hands is an incredibly difficult skill to hone, and I hope that my experiences and tricks will go on to inspire and help you, whether you use them for yourself or use them to inspire your own variations. Art is a very fluid thing after all.
Share this tutorial with other artists, and comment on this tutorial or add your own tips and techniques for drawing fists in the comments sections below. You can also share a link to art that this tutorial helped you with if you wanted, or ask for further advice from other folks in the comments thread. Thanks for reading!
Photos and drawings by Cortlyn Matney.